
SealHut · Plan the portion, then choose the machine
Best vacuum sealers for meat
For steaks, mince, chicken and bulk purchases, compare moisture control, useful bag sizes and the packing routine.
A good meat-packing setup starts with the portions you will actually use. The machine needs to fit those packs, the bags need to suit the food, and the sealing area needs to stay clear. More suction is not the answer to every problem.
A researched guide for Australian buyers. No hands-on comparative tests, invented ratings or fixed current prices are claimed. As an Amazon Associate, SealHut earns from qualifying purchases through the product buttons.
The quick answer
External machines for ordinary portions; investigate a chamber for liquid-containing packs
Start by comparing the INKBIRD INK-VS04 and HiCOZY H600 for an external-sealer routine. Their documented or listing-described controls are useful features to investigate, but the exact bag, regional version and cycle instructions still matter.
For repeated liquid-containing packs, investigate the supplied Wevac chamber listing instead of assuming a moist-food setting on an external machine handles free liquid. Check its actual model, usable chamber and permitted procedure.
For bone-in cuts, the bag and any approved protection matter whichever machine you choose. A stronger pump or a second heat seam cannot repair a puncture elsewhere in the pouch.
Keep perishable food refrigerated at 5°C or colder and follow its storage instructions. Keep raw meat separate from ready-to-eat food. Do not add a shelf-life promise simply because air has been removed.
Three options from the product bank
The meat-packing shortlist
These are candidates matched to different jobs. We have not measured their seal retention, comparative speed or batch durability. Confirm the current seller’s exact model and supplied kit before buying.
INKBIRD INK-VS04
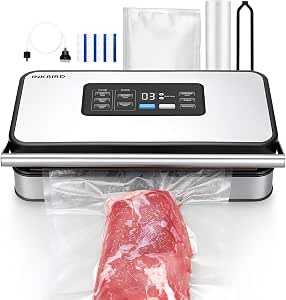
INKBIRD documents a dual-motor, dual-pump external machine with different food and operating options. Compare the exact controls and cycle guidance with your usual portion-packing session.
Its appeal is having a named model and manufacturer guidance to examine. Dual pumps do not establish that it suits every batch or liquid-containing pack.
Check: AU version, manual, bag width and pauses between cycles.
Check INKBIRD on AmazonHiCOZY H600
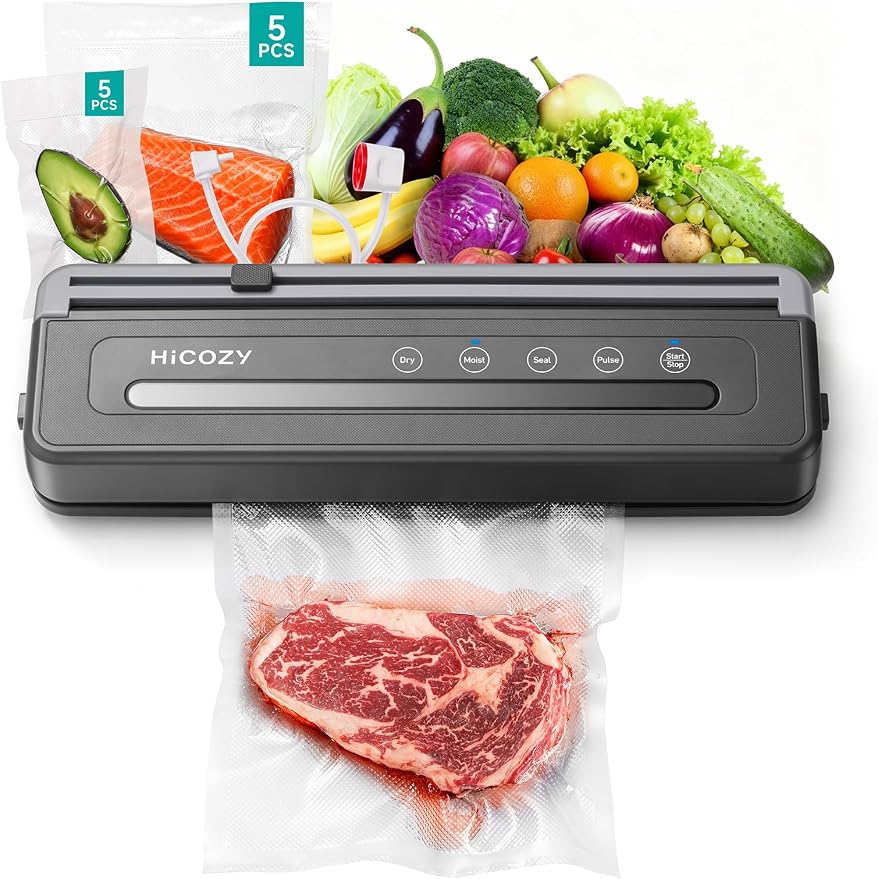
The supplied H600 title describes dual sealing, five modes and a cutter. HiCOZY’s UK manual index identifies an H600 model with dry and moist operation.
Compare the controls, cleaning access and actual regional version. A dual-seal feature is worth inspecting, but it is not proof that the bag cannot leak or be punctured.
Check: exact H600 manual, AU electrical version and compatible supplies.
Check HiCOZY on AmazonHiCOZY manual index. Match the manual to the delivered model.
Wevac 30cm 5.3L listing
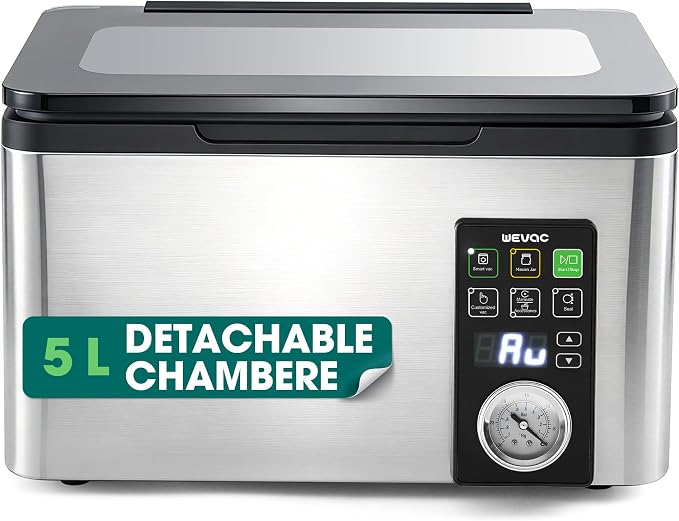
This supplied chamber listing describes a 30cm sealing system and a 5.3L chamber. Investigate it when your routine includes liquid-containing food that suits the exact model’s packing procedure.
Chamber volume alone does not establish usable food capacity. The pouch, portion thickness, sealing area and lid clearance determine fit.
Check: model, chamber drawing, pump care and regional version.
Check Wevac on AmazonCompare the chamber options. Do not transfer dimensions from another Wevac model.
| Job | System to investigate | Main buying checks |
|---|---|---|
| Steaks, mince and ordinary portions | Suitable external sealer | Bag sizes, controls, cleaning and cycle guidance |
| Liquid-containing packs | Appropriate chamber system | Permitted procedure, fill level and usable chamber |
| Bone-in cuts | Suitable system and protective packaging | Puncture risk, pouch fit and approved protection |
A useful first comparison
Which system fits your meat-packing job?
This selector points to a machine type and buying checks. It does not validate a food-handling procedure or certify a product’s capacity.
Features in the right order
Moisture control, clear bag placement and cleaning access
Read what the moist setting actually does
Food-mode names vary between machines. Read the exact manual to learn what a moist setting changes and which food conditions it permits. Do not treat it as permission to draw a pool of marinade towards an external machine.
If liquid packing is a repeated job, investigate the correct equipment before choosing an external sealer on price alone. A chamber system may suit the task, but its model-specific procedure still needs checking.
Keep the sealing area visible
Look for a setup where you can position the bag mouth clearly and inspect the completed seam. The bag opening needs the clean, clear allowance required by the instructions.
A second seam can be a useful feature to examine, but it is not a substitute for correct positioning. It also does not protect the rest of the pouch from a sharp bone or another puncture.
Check cleaning after a real packing session
Find out how the tray, sealing area and other accessible parts are cleaned. Which parts are removable? Which need to stay dry? How are they put back correctly?
These questions can matter more than a long list of modes when you pack raw meat regularly. A machine that is inconvenient to clean may be a poor fit for the routine even if its feature list looks impressive.
Plan before opening the bulk pack
Turn a batch into portions you will actually use
Enter the batch weight and the target pack weight that suits your meals. The planner can keep that target with a smaller final pack or spread the batch evenly across the same number of bags.
These are packaging calculations, not serving recommendations. Bag dimensions, food thickness and the machine’s fit requirements still need checking.
Different cuts, different packs
Let the cut influence the portion plan
Steaks and individual cuts
Decide which pieces you expect to use together. A calculator can divide weight, but it cannot make every steak the same shape or thickness. Compare the actual pieces with the usable bag area and the machine’s supported opening width.
Mince and diced meat
Choose a practical pack weight for the meals you prepare. Check the shape the filled bag takes, not only its weight. Leave the required clear sealing area and use the food and machine instructions for packing and storage.
Chicken pieces and bone-in cuts
Compare the whole portion with the bag dimensions. Bones and irregular shapes add packaging questions that a weight calculation cannot answer. Confirm any approved protection and keep raw poultry handling separate from ready-to-eat food.
Larger cuts
A long cut can exceed the usable space of a chamber even when its volume sounds sufficient. An external system has different placement requirements. Measure the pack you want to make and compare it with the exact model’s guidance before buying the machine.
Packaging deserves its own check
Choose bags for the cut and the machine
Start with the bag type the machine supports. Many external machines need suitable textured bags, while chamber systems can support suitable smooth pouches. Confirm the exact material and specification rather than assuming a similar-looking bag works.
Choose practical widths and lengths for your usual portions. A wider bag is not automatically more convenient: it may consume more material and still be awkward to position on the seal bar.
Leave the clear sealing area the instructions require. The outer bag length includes that area, so it cannot all be filled with food. Do not force a bulky portion into a bag that becomes difficult to close or position.
Bone-in cuts need a puncture check
Inspect the packaging requirements for ribs, chops and other cuts with sharp or exposed bones. Use only protection permitted by the food-packaging and machine instructions. Do not improvise with materials that are not specified for that use.
A pump setting cannot repair a hole in the side of a pouch. If you repeatedly pack awkward bone-in cuts, compare the approved packaging options before choosing a machine.
Cooking suitability is a separate question
For sous vide, select bags specified for the intended temperature and duration. A food-storage or freezer-safe label alone does not establish cooking suitability. Use the bag supplier’s directions alongside a validated food-cooking method.
Check vacuum bags for sous videMake the packing session straightforward
A practical meat-packing workflow
- 01Plan the portions and supplies.Choose the amounts you intend to use together and set out suitable bags. Compare the bag size and sealing allowance with the actual cut before starting.
- 02Keep raw and ready-to-eat work separate.Follow safe food-handling guidance for hands, utensils and work areas. Arrange the session so raw meat juices do not contact food that is ready to eat.
- 03Position the opening as directed.Keep the required sealing area clear. Select the setting the exact manual specifies for the food condition; do not guess from a mode name.
- 04Check the finished pack.Inspect the completed seam and bag as instructed. Investigate an incomplete seam or a damaged pouch before putting the pack into storage.
- 05Label and store appropriately.Record the food, portion information and packing date for organisation. The packing date does not create a new use-by date. Follow the food’s storage instructions.
- 06Clean according to the manual.Follow the machine’s cleaning, drying and storage directions. Read the exact bag guidance before deciding whether any used pouch may be reused.
Budget and workload
Do not buy a batch-performance promise from a headline
If you pack only a few portions each week, a straightforward external machine may suit the routine better than a larger chamber unit. Compare the setup, cleaning and supplies rather than paying for capacity you will rarely use.
If you work through larger sessions, read the model’s required pauses, duty-cycle limits and maintenance directions. A dual pump, strong suction claim or large motor does not establish unlimited consecutive sealing.
For a chamber machine, include the permanent bench space, lid clearance, handling and pump care. An attractive pouch-cost comparison does not remove these ownership requirements.
Bag costs also depend on practical sizes and the amount you cut from a roll. Compare equivalent usable packs and include delivery. Our budget guide’s machine-and-bag calculator can help with purchase arithmetic; it does not guarantee food savings.
Handling and storage
Keep the cold-storage plan separate from the vacuum machine
Follow the meat’s storage instructions and safe handling guidance. Store raw meat separately from or below ready-to-eat food to reduce the risk of juices contaminating other items.
Vacuum packing is not a reason to leave meat on the bench or create a longer use-by date. This guide deliberately does not assign a universal number of extra storage days to a vacuum-packed cut.
For thawing, FSANZ recommends the refrigerator or microwave rather than room temperature. Follow the food’s specific instructions as well.
For cooked meat or prepared meals, follow the applicable cooling and storage guidance before packing. The sealer does not replace a safe cooling process. For cooking in sealed bags, consult NSW Food Authority sous vide guidance.
Sources: FSANZ storing food safely and food safety basics.
Practical answers
Vacuum sealers for meat FAQs
Which vacuum sealer should I compare first for meat?
For ordinary meat portions, compare the INKBIRD INK-VS04 and HiCOZY H600 against the exact bag, controls and packing routine you need. For liquid-containing packs, investigate a chamber machine such as the supplied Wevac listing. These are researched candidates, not winners from a hands-on comparison.
Does vacuum sealing make raw meat safe without refrigeration?
No. Vacuum packing does not sterilise meat or replace refrigeration. Keep perishable food refrigerated at 5°C or colder and follow its storage instructions. Keep raw meat separate from ready-to-eat food.
Can I put marinade in an external vacuum sealer bag?
Do not assume a moist setting permits free liquid to be drawn towards an external sealer. Follow the exact model instructions. If liquid-containing packs are a repeated job, investigate an appropriate chamber system and its permitted procedure.
Does a double seal stop bones puncturing a bag?
No. A sealing seam and a puncture elsewhere in the pouch are different issues. Use suitable bags and follow the bag and machine instructions for bone-in cuts and any approved protection.
How much meat should go in each bag?
Choose the amount you expect to use together. The planner divides your entered batch into portions; it does not prescribe serving sizes or dietary needs. Keep the bag’s sealing allowance and machine fit requirements in mind.
Can I reuse a bag that held raw meat?
Follow the instructions for the exact bag and its previous contents. Do not assume that a reusable label permits reuse after raw meat. Discard bags when the supplier directions or their condition require it.
Can vacuum-packed meat be thawed on the bench?
Use safe thawing guidance. FSANZ recommends thawing frozen food in the refrigerator or microwave, rather than at room temperature. Follow the food’s instructions.
Can a meat vacuum sealer be used for sous vide?
Use a compatible bag specified for the cooking temperature and duration, and a validated cooking method. The sealer performs a packing step; it does not establish safe cooking or storage.
Should I add extra shelf-life days after vacuum packing?
Do not create a new use-by date simply because the meat has been vacuum packed. Follow the food’s storage instructions and appropriate food-safety guidance. This guide does not provide a universal shelf-life extension.
Before ordering
Confirm the machine against your actual packs
- Exact model, AU electrical version and seller bundle.
- Compatible bag sizes and clear sealing allowance.
- Permitted procedure for moisture or liquid-containing food.
- Controls, pauses and maintenance for the intended routine.
- Cleaning access and model-specific replacement parts.
- Delivered purchase price and suitable replacement supplies.
Choose the repeated job first
For ordinary portions, compare the external candidates. For liquid-containing packs, investigate the chamber option and its procedure. For bones, solve the packaging question whichever machine you use.
The best purchase is the one that fits the bags, the cut and the routine you will follow.
Sources and selection method
How this guide was researched
We used the supplied INKBIRD INK-VS04, HiCOZY H600 and Wevac links and images. We checked INKBIRD’s specifications, HiCOZY’s H600 manual index and Australian food-safety sources. Exact regional models and seller bundles still need confirmation.
Recommendations match features and system types to packing tasks. We have not measured comparative speed, pressure, seal retention or freezer-storage life. The portion planner performs arithmetic using your inputs and does not establish a safe portion, storage duration or bag capacity.
- INKBIRD: INK-VS04 specifications
- HiCOZY: H600 manual index; match the exact regional model
- Wevac: exact-model manuals and downloads
- FSANZ: storing food safely
- FSANZ: food safety basics
- NSW Food Authority: cooking sous vide
As an Amazon Associate, SealHut earns from qualifying purchases. Product buttons are affiliate links; prices and availability can change. Read the disclosure.