
SealHut / FoodSaver / Lock & Seal
FoodSaver VS4500 review: simple locking, straightforward bag packing
A familiar packing routine can matter more than a crowded control panel. The VS4500 is worth a look when you want a simple lever and bag controls, with supplies organised separately.
Check VS4500 on Amazon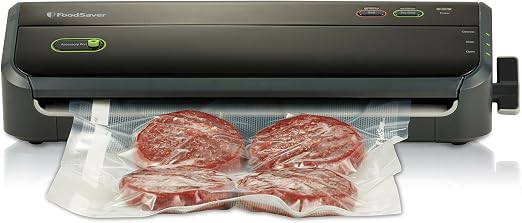
Our buying assessment
The appeal is an easy-to-repeat routine
The FoodSaver VS4500 Lock & Seal is a sensible product to compare when you want to pack ordinary home portions without learning several programmes. Its documented approach centres on closing and locking the lid, then choosing a bag function. That can be appealing when different people in the household share the equipment.
Our verdict
Shortlist it when straightforward operation and the FoodSaver bag-and-accessory system suit your needs. Compare an integrated cutter model if custom roll bags dominate your routine, or a chamber design if liquid packaging is the main job.
The buying question is not whether a longer feature list is always better. It is whether the machine makes your usual job easier. Preparing a few freezer portions, handling a compatible reusable bag and cutting material from a roll are different tasks. Count all three when deciding what convenience is worth paying for.
This is a documentation-based review. We have not measured suction, seam strength, cycle time, noise or longevity. Our recommendation concerns the operating arrangement and the decisions a buyer can assess before ordering. Qualifying Amazon purchases may earn SealHut a commission; see our affiliate disclosure.
Why compare it?
A short control sequence, a locking lever and an established accessory system give it a clear purpose for manageable home portions.
What to plan around
Separate roll cutting, compatible material, space for loading and cooling pauses all remain part of the session.
Answers first
FoodSaver VS4500 questions
Who is the VS4500 best suited to?
It is worth comparing for ordinary household portions when simple bag sealing and a locking lever fit the routine. Check supplies and operating pauses before planning a larger batch.
Does the VS4500 have a built-in cutter?
The manufacturer’s roll-bag procedure uses scissors. Plan a separate cutting tool rather than buying this model for integrated cutting.
Does it have Dry and Moist buttons?
The documented controls are Seal and Vacuum & Seal. Do not copy a dedicated Dry/Moist control panel from another FoodSaver model.
Can I stop vacuuming and begin sealing?
The guide explains that pressing Seal during vacuuming stops air removal and begins sealing. Follow the actual instructions; this is different from a dedicated Pulse button.
How long should I pause between uses?
The manufacturer’s guide specifies 20 seconds of cooling after each use. Follow the guide supplied with your unit and allow any additional recovery it requires.
What comes in the starter kit?
FoodSaver’s model page lists a 27.9cm starter roll, five pre-cut bags, five reusable zipper bags and an accessory adaptor hose. Confirm the seller’s exact contents.
Can it seal compatible zipper bags and containers?
An accessory adaptor hose is included in the documented kit for FoodSaver containers and vacuum zipper bags. Check the approved connection and procedure for the actual accessory.
Can I pack soup directly in a bag?
Do not treat this external sealer as a chamber machine. Follow the manufacturer’s preparation guidance for wet food and compare a chamber design for frequent liquid tasks.
Is the VS4500 suitable for sous vide preparation?
It can prepare suitable sealed packaging. The exact bag must be approved for the cooking conditions, and the food still requires an appropriate validated cooking method.
Documented equipment
Check the model and starter supplies
FoodSaver’s Australian model page documents a locking lever, accessory port, cord storage and removable drip tray. Treat those as listed features, rather than proof of a particular result with your food. The seller’s exact kit should match the order you place.
| Item | What to check |
|---|---|
| Bag controls | Seal and Vacuum & Seal in the manufacturer guide |
| Roll preparation | Scissors used in the documented procedure |
| Accessories | Approved hose, containers and zipper bags |
| Starter supply | Roll, five pre-cut bags and five zipper bags on the model page |
| Cleanup | Removable tray; follow washing and reassembly instructions |
| Power and support | Australian unit, suitable plug and current seller support |
The model page lists dimensions as 170 × 200 × 470mm without labelling the axes. Do not assume that gives you an operating footprint. Ask for the actual width, depth and height, then allow room for the open lid and a filled bag in front.
Compare the delivered purchase with replacements you will actually use. A starter kit is useful only when its sizes fit your portions. Ask about the roll specification and the supply cost after those initial bags are gone, rather than valuing the kit solely by the number of items in the box.
Before pressing a button
Understand the latch as part of the sequence
A simple control panel still depends on correct loading and lid position. The guide distinguishes Open, Operate and Store. Learning those positions can prevent the common mistake of treating the appliance as though closing the lid is the entire setup.
Latch position guide
Use the Open position for access to the bag area. Position material as the guide instructs before closing and locking.
The bag opening also has a different placement for seam preparation and vacuuming. Making the bottom of a roll bag is a sealing task. Vacuuming a filled pouch requires its opening to reach the vacuum channel as directed. Confusing those two placements can leave the motor running without the expected result.
If something behaves unexpectedly, return to the model-specific loading instructions. Do not infer a fault from one bag before checking its position, material and opening. Record a repeatable problem clearly for support if the documented checks do not resolve it.
Bag preparation
Scissors and a clear cutting area still matter
This model’s roll procedure calls for a straight cut with scissors. Set aside a clean, convenient cutting area and keep the material supported. A sloping cut can make the opening harder to arrange, especially when you have already filled the pouch.
Custom length is useful for varied portions, but the roll width remains fixed. A longer piece of a narrow roll may still be unsuitable for a bulky item. Compare the actual portion shape and loading requirements with the bag sizes you intend to buy.
Ready-made bags remove cutting and bottom-seam preparation. They can be convenient when your portions are consistent or when you only pack a few items at a time. A roll may be more flexible, but flexibility is not the same as a lower whole-purchase cost.
FoodSaver’s guide calls for 7.5cm of space between contents and the top of the filled bag. Follow its full instructions, including extra allowances where applicable. Do not shorten the pouch purely to reduce material use if that leaves too little space to load and seal comfortably.
Separate preparation from food handling where practical. Count and cut suitable empty bags, then bring out a manageable group of portions. That helps you keep track of prepared bottom seams and inspect each opening without searching for supplies mid-session.
Plan a manageable session
Allow time for cooling as well as sealing
The manufacturer guide specifies cooling after each use, and it describes longer recovery if heavy use triggers overheating protection. Those are ownership considerations before you plan a large job. Do not turn a short automatic function into an assumption of uninterrupted throughput.
Operation and cooling planner
Starting operation times are arithmetic examples, not measurements. The cooling field starts at the guide’s 20-second reference and cannot be set below it. Additional recovery may still be required.
The result adds the durations you enter. It does not predict the actual appliance cycle or approve a continuous batch. Cutting, loading, inspection, food handling and cleanup are excluded, so reserve time for those tasks separately.
A roll-made pouch adds a bottom-seam operation before filling. In the example, switching some ready-made pouches to roll-made bags increases both entered work and cooling allowance. That is a useful reason to compare the entire sequence rather than just the number of finished packs.
A separate packing choice
Decide between a sealed pouch and a reusable accessory
A pouch you will open once is a different routine from a container or zipper bag you intend to access repeatedly. The accessory system is worth considering when that second routine is common, but the connection must be approved for the exact vessel and hose.
Check the actual contents of the kit before assuming every accessory shown in a promotional image is included. A supplied hose does not mean a container, jar attachment or bottle stopper comes with it. Include any extra compatible accessory in the purchase comparison.
Consider washing, drying and permitted reuse as part of the format choice. Follow the material and food-specific instructions. Do not reuse a bag simply because its opening can be sealed again; previous contents and the condition of the material also matter.
Use the bag guide for a heat-sealed pouch and the accessory guide for a valve connection. Those are different interfaces, and a leaking accessory does not automatically mean the pouch-sealing function has failed.
Care and food handling
The tray makes cleaning access worth checking
A removable tray can make collected residue easier to reach, but it is not permission to draw liquid into the machine. The guide explains how to keep moisture away from the channel and seal. Read those preparation directions before packing meat juices, fish or marinated portions.
After use, unplug and follow the washing, drying and reassembly instructions. Keep the sealing area free of residue and protect the foam gaskets from damage. Use the specified storage latch position rather than leaving the machine clamped as though it were running.
For sous vide, use bags approved for the cooking conditions and a validated method for the particular food. The sealer does not choose cooking temperature or verify pasteurisation. NSW Food Authority guidance is a useful reference alongside the actual method.
Vacuum packing does not sterilise the contents or remove refrigeration requirements. Follow the food’s storage and use instructions. We do not assign an extra safe shelf life from the appearance of a tight pack or a marketing freshness multiplier.
The cost after the starter kit
Count the supplies your regular routine will use
A useful comparison starts with a typical week rather than an unusually large packing day. Write down how many ready-made pouches, roll-made bags and permitted accessory uses you expect. Each format has its own supply and preparation cost, even when it uses the same appliance.
For example, a hypothetical routine of six roll-made bags with full 35cm cuts allocates 2.1 metres of material each week. Repeating that exact routine for fifty-two weeks would allocate 109.2 metres before tails, retries or changed portion sizes. This is arithmetic illustration, not a forecast of your usage or a claim about the right pouch size.
For ready-made bags, divide the delivered pack price by the number of bags you can actually use. If half the sizes in a mixed pack do not suit your portions, the headline bag count can overstate its value to you. Compare material approved for the same purpose rather than treating all storage bags as equivalent.
For rolls, keep the width and full cut length visible in the comparison. A smaller price per roll can hide a shorter roll, and a cheaper metre may still require a larger upfront purchase. Check what material you already own before ordering enough new stock for an assumed year of use.
A small supply record also makes the next session easier to prepare. Note compatible sizes, where replacement material was purchased and what remains usable. Keep scissors and the approved accessory hose with the supplies. When the routine is occasional, that simple organisation can make separate cutting quite manageable.
If the routine is frequent enough that preparation becomes frustrating, compare the convenience of an integrated cutter before buying more supplies around the current setup. The decision should follow the work you repeat, with the appliance purchase and ongoing material considered together.
Choose by workflow
VS4500 or a more integrated machine?
Compare the FoodSaver VS2198 when a cut-and-seal setup is part of your shopping brief. Compare the VS3198 when its documented controls and arrangement better suit your tasks. Keep the exact models separate rather than combining the best features into one imaginary FoodSaver.
The Anova Precision Vacuum Sealer Pro is another integrated roll workflow to investigate. Confirm the regional electrical configuration on the actual offer as well as bag compatibility. A useful comparison looks at the complete routine and delivered total, not brand names alone.
For recurring soup or liquid-rich preparations, use our chamber vacuum sealer guide as the starting point for a different packaging method. If cordless positioning matters, the INK-VS06 review addresses that separate priority.
Final assessment
The VS4500 has a clear role for manageable home bag packing with straightforward controls. Buy for that fit, comfortable with separate cutting and the operating pauses. Confirm the seller, Australian unit, starter contents and replacements before comparing the final total.
Check VS4500 on AmazonSources: FoodSaver Australian model page and VS4500 user guide. Our buying assessment interprets documentation. The session planner adds entered allowances; it does not measure speed or predict recovery.